
I threw together a blog post of all I was going to attempt to do to quickly get a pulled-together-looking garden, with minimal effort. Let’s revisit and see how things are shaping up now that spring has sprung!
Things I’d do differently next time:
Prioritising pollinators!
I sort of assumed that most flowering plants were good news for the nectar-drinking, pollen-spreading critters of the world. You know, bees, butterflies, maybe some hummingbirds and certain kinds of flies…. honestly, I’m not even sure what else there is, and I think most of us focus primarily on bees, right? But anyway – wildlife as it relates to flowers.
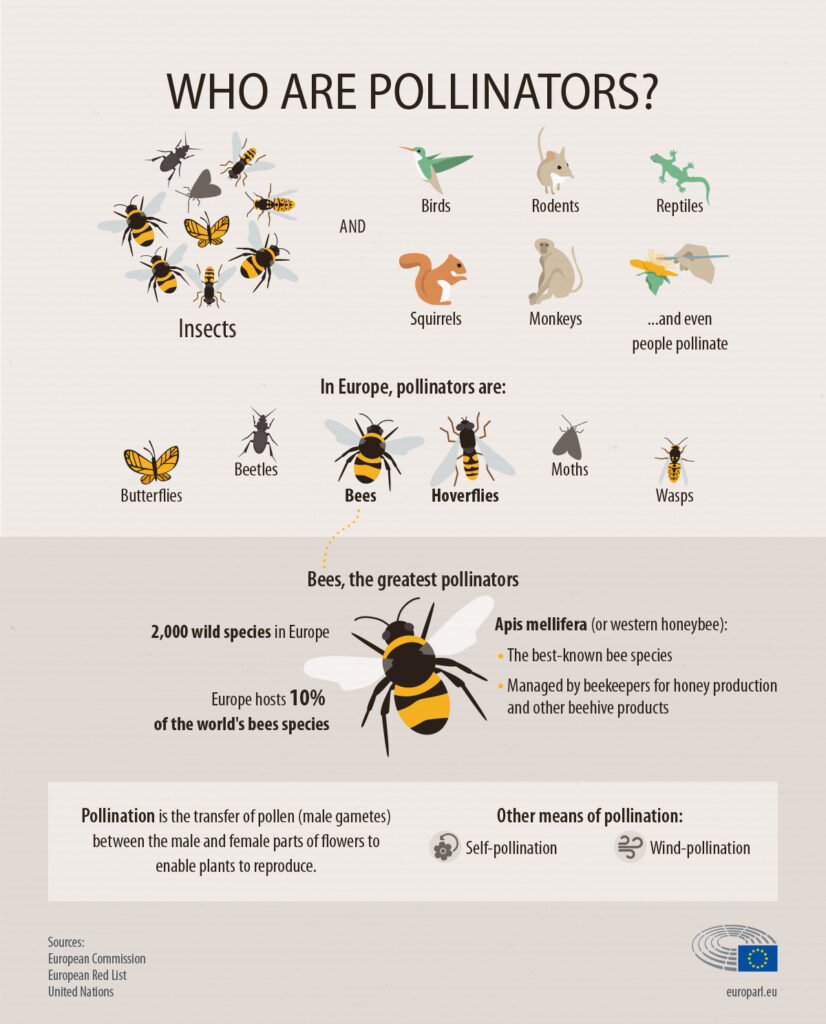
Welp, turns out my assumptions there were wrong! Several kinds of popular garden flowers have unfriendly characteristics for pollinators. Sometimes this has been really counter-intuitive for me! For example, apparently petunias are useless, despite having what looks to me like a perfect little tube for a proboscis or long beak, you know?
From this Wildlife Gardening Forum post
Bedding Plants are highly hybridised annuals used in hanging baskets and tubs and planters. They are the result of breeding to create strains with uniform size, long-lasting flowers, bright colours, and a long retail ‘shelf life’. Production of pollen or nectar accessible to insects has generally been lost, which is why we avoid them in wildlife gardens. Typical examples are busy lizzies (Impatiens), Petunia, surfinias (which are a type of Petunia), bedding “geraniums” (Pelargonium hybrids), Nemesia, double flowered ‘French’ and ‘African’ marigolds, Celosia, Begonia, and Ageratum. The brightly coloured winter-flowering Polyanthuses and winter-flowering Viola also fall into this category.
In addition to the above specifics, the post generally cautions against “showy” flowers with double blossoms, which unfortunately I got a few of this year. But I’ll keep this in mind in future, and double down on the things I absolutely know are beloved by my local bumblebees, at minimum – campanula and foxglove being two specific huge hits. Plus, a few items in each category actually are good for pollinators – like some pelargoniums are OK – so you just have to pay attention on a per-flower basis I guess.
And hey, all plants are useful while they decompose for “detritovores” plus the things that feed on those, so you can still be wildlife friendly if you leave some messy decomposing areas. Yesterday, I was delighted to come upon a tiny toadlet which had crawled out from our wildlife pond and was hanging around in the damp shady area behind the pond barrel where I tend to dump my deadheading and leaf clippings. Success! I now feel vindicated by my choice to leave things messy on purpose… helped along by the national local council funding crisis which means we now have a big fee to pay for any garden waste. (And yes, a whole post is forthcoming about said pond.)
Better sun consideration
I had prioritised aesthetics a bit too highly in my first arrangement of this garden. That meant that my lemon and olive trees weren’t getting as much sun as they probably needed. So I shuffled some concrete lions and some pots around – it’s an improvement functionally, if not aesthetically. (It was super annoying to do with my very heavy planters, so I have to post about it in the odd hope it ever saves anyone else this kind of work! Put the sunny things in sun, haha. Concrete sculptures don’t require sun for survival; lemons do.)
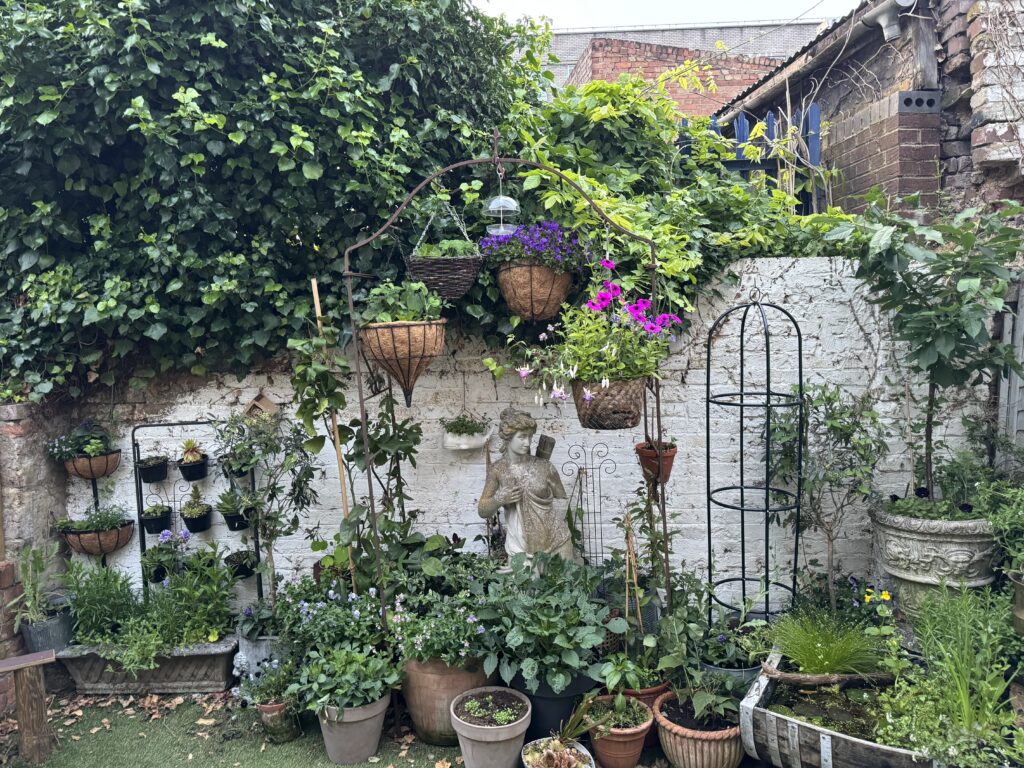
My five-year-old Ikea (!) lemon tree (left of Artemis outside the arch) had started to show a bit of concerning leaf drop – my gardener and neighbour told me to put it to Picture This, which is that the plant was perfectly healthy. But I relocated it here anyway to get it some more sun, as I think that’s my best long-term bet for growing lemons in London. In our last flat it was doing better before in full sun against a dark brick wall; this wall is white painted but still brick and much sunnier and probably retains more winter heat.
Too much summer fun?
In fairness, I think most gardens probably have this “problem.” But although several things are in bloom and looking lovely now, a huge portion of my garden still hasn’t bloomed. Admittedly this is the first year, so some stuff that might normally be more floriferous at this point hasn’t really established yet, but I think I need future purchases to more deliberately focus on blooms during non-summer seasons. (I tried hard to be deliberate about spreading the fun through the year, but I do have a fondness for stuff that happens to thrive in July/August when we’re most likely to be on holiday, haha.)
Strategic bulb placement
Spring flowering bulbs are trickier than I realised. Apparently some of them don’t do well staying planted after they flower (because all the water you’ll put in the soil around them for other plants to flower in summer will make some bulbs rot, I guess?). I had always left them in the ground in Seattle, but I think in spots with better drainage. Or maybe I just got lucky, or memory fails me, or or or. Who knows.
Bulbs also tend to look pretty crappy when you let the plants die after flowering… and yet you’re supposed to let them die naturally, so the nutrients from the fading greenery can get absorbed back into the bulb. With a tiny garden like mine without much space to plant a disguising plant in front of dying bulbs, this can harsh the vibe!
My solution has been to dig up the bulbs, and stick them in another pot of shallow soil somewhere out of the way in my side run, out of the main garden view. That way they can have their slow ugly healthy death, and I get space to put in something else instead. This works for now, but I don’t know if I’ll want to do this every year.
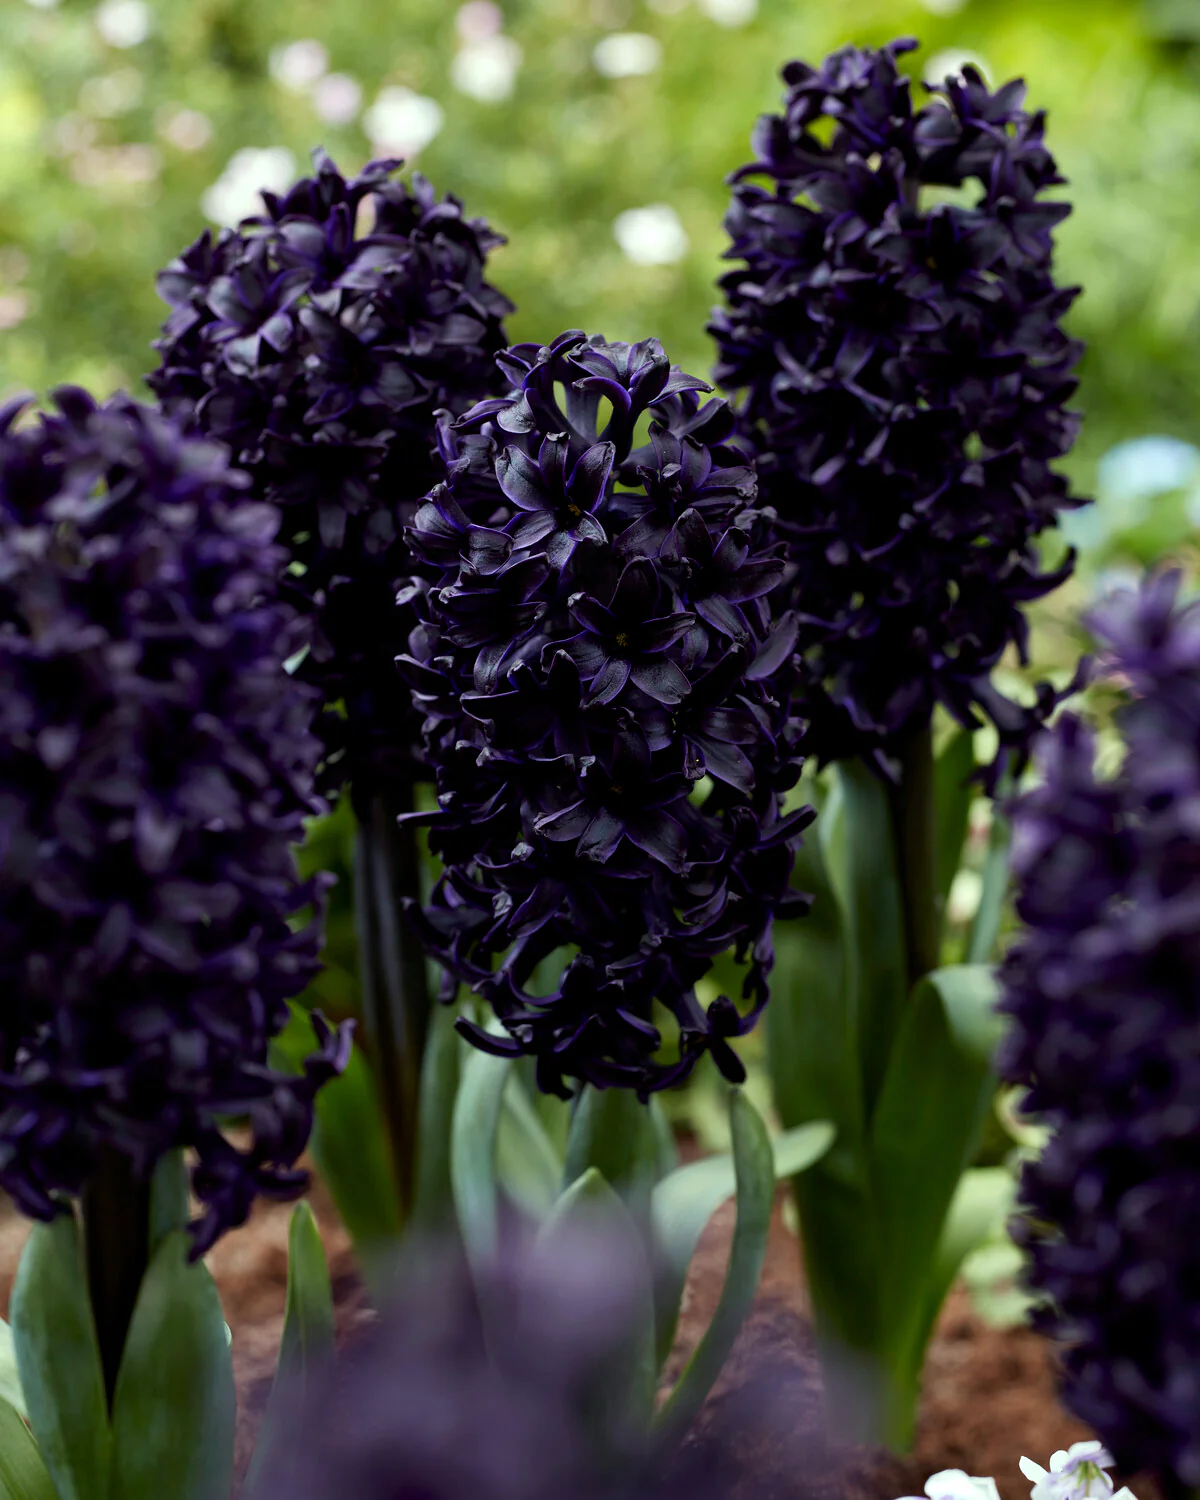
The bulbs I dug up and let slow-die this year were tulips, muscari/grape hyacinth, and anemones. I want to add in some white narcissus/daffodills too and some deep black-purple hyacinths, but if I do, I’ll have to account for digging those up for their own slow ugly deaths, too. (Maybe the hyacinths will be fine-looking in place, and maybe I can better disguise dying daffodil foliage when things have filled out more next year.)
Next fall, when it’s time to plant out spring-flowering bulbs, I might try to locate all such bulbs all in their own special pot(s) and then move the whole pot next time to a quiet slow death spot. The upside of the way I did it was that I got to make more space for other fun plants; the downside is that it was definitely more work. Maybe I’ll always like the excuse to go putter around digging things up, and replacing with more exciting new finds. These bulbs were certainly useful for peppering in some colour in spots that are otherwise bare or greenery-only in late winter/early spring.
Note that I learned the expensive way how some bulbs, such as bearded iris, are just really unlikely to thrive in a container. Now I know, sigh. I won’t bother repeating these until I get to a place of being able to plant directly in the earth with decent drainage.
For late-spring early-summer blooms, I recently peppered gladioli and ranunculus (ranunculi?) throughout my garden, and I guess I’ll suck it up and dig those out by hand when they’re done flowering. (Or I maaaay cheat and leave a few in place to gauge whether I can get away with being lazy every year. Wouldn’t that be nice?)
I also have a single Hot Pot full of summer-flowering bulbs that are all very much frost tender, so I’ll relocate that container for winter in my cold frame, wrapped up in something, and hope for the best. This is a very tropical attempt for London – pale pink tuberose, several lovely coloured callas, freesia, trailing begonias, a “Voodoo lily,” curcuma/Siam tulip, and I feel like at least one more I’m forgetting. Very colonialist vibes I suppose, heh. But perhaps global warming will be on my side here and they’ll survive the winter? Time will tell.
Height
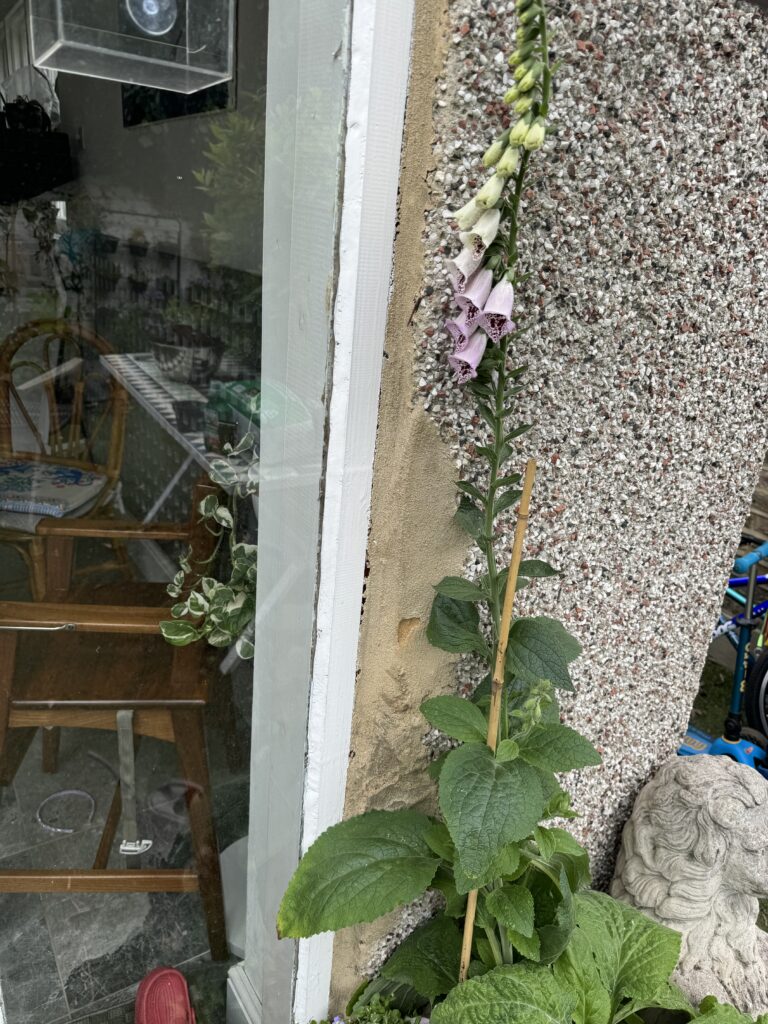
In my excitement to create optimal container displays, I tried to follow that thriller/spiller/filler/potential pillar rule. But I picked a foxglove to go in a relatively shallow container, and they look sort of silly towering tall! Next time I would stick something like foxglove in a row waaaaay in the back of a more bedding-shaped container like a trough perhaps, or of course into an actual bed, and leave the urn-shaped planters for slightly shorter options, even if the “thriller” or “pillar” is still taller than the other elements – perhaps not THAT much taller! (That said, my little kids do adore seeing “big fat fuzzy bumblebees” frequent the foxgloves placed right by our kitchen door/windows.)
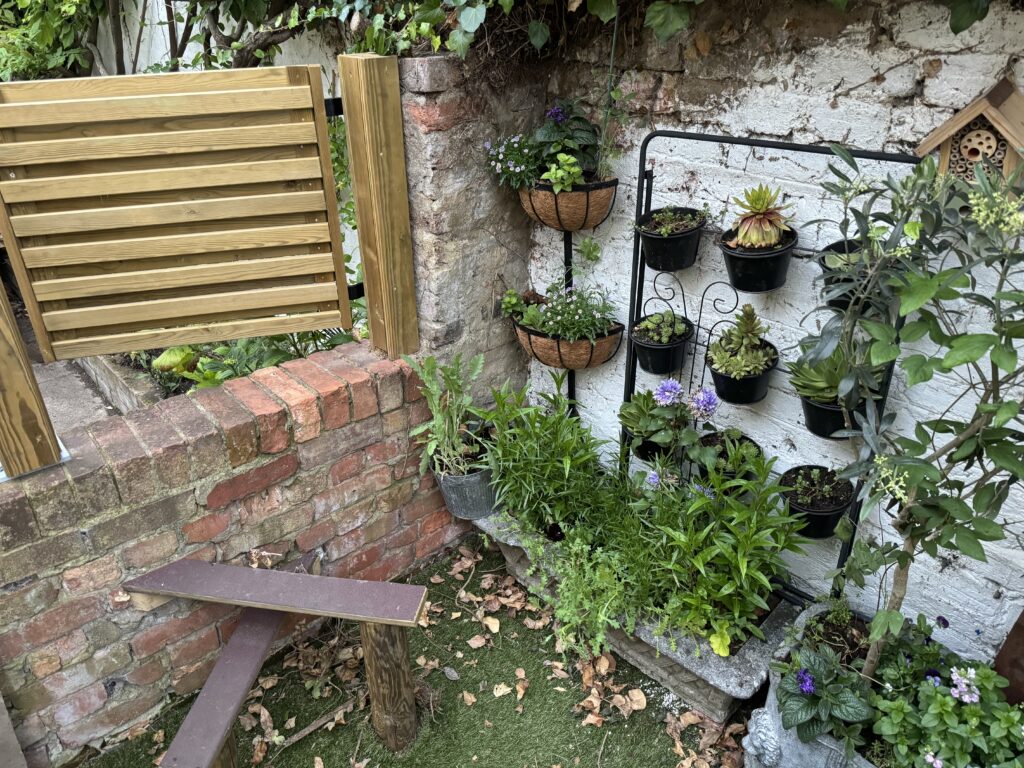
The other thing I’m learning to prioritise is getting some taller planters into the mix. When you see a taller skinnier planter, it’s so useful to add some height to a display when you tuck it behind something lower but wider. This seems obvious in hindsight but I didn’t initially prioritise tall planters.
The ones I like best are these but I dithered a long time before buying them because of the price. (Note that not all plants will be happy with something taller and deeper or metal like this! Read the fine print.) I might even buy another pair of these, or spring for something even taller than those to layer in the back. (But I should curb my container-buying habits anyway since long term I want to transition to proper border beds post remodel.)
Eventually, once our whole back garden/yard situation is sorted, I’d like to get those acanthus leaf concrete urn planters up onto the matching round plinths I bought ages ago. I’m really pleased with my authentically patinated garden haul, but some pieces aren’t getting the recognition they deserve right now, haha. That will change with time and remodelling. An urn-style planter elevated on a plinth is a luxurious, elegant “height” touch indeed, regardless of its contents.
Legginess
Some plants grow bushy and fill in and look lovely. Some climb long and lean. Some do both! Others, however, get “leggy” and look a bit straggly.
I’m not nuts about how this aubrietia shows up (probably since it’s in the very front of my containers as a sort of spiller-esque element, so its scraggly looking area near the roots is too prominent.) I might just dig them up and relocate them so they start under the rim of a pot that I hang up high. But really, I feel like aubrietia is over-hyped and not that cute! Now I know.
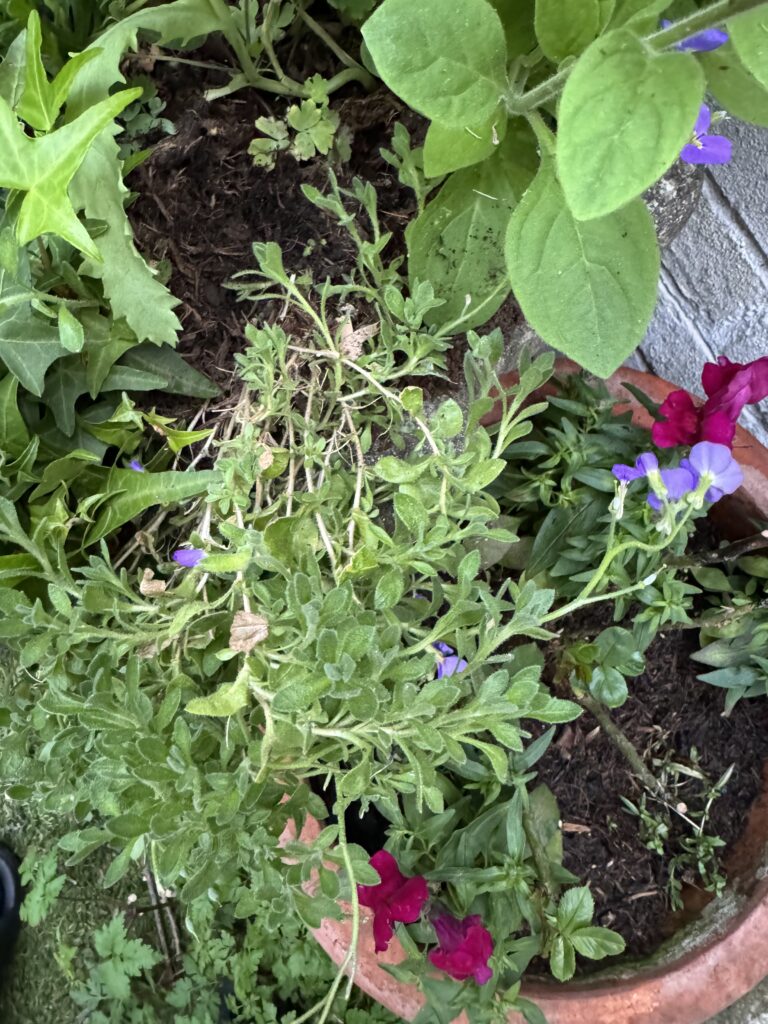
I also got a couple trays of viola plug plants that I originally thought were cute, in kind of an old-school, “we had these in window boxes when I was growing up” sort of way, but my mum complained about how she doesn’t like the way the grow leggy on her over time.
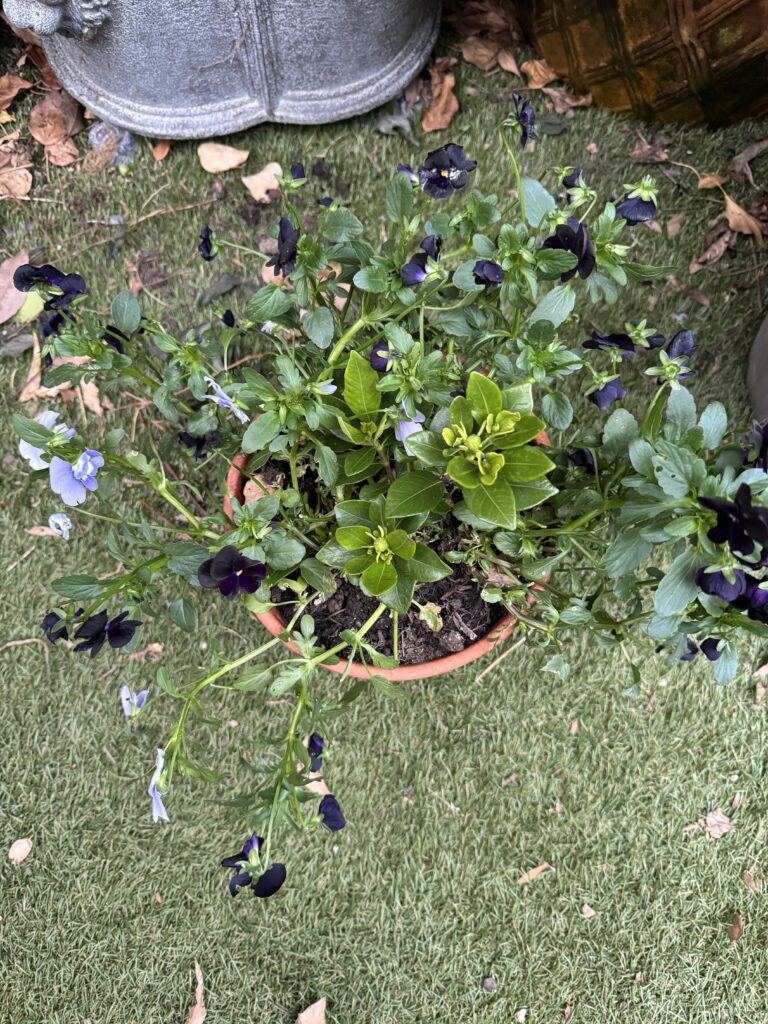
…Yeah. It’s not bad per se when I leave it alone, but it is starting to look silly in some spots. (I deliberately pulled these out to demonstrate; they do look a bit better when I leave them alone…. so they can starve the gardenia of sunlight! Sigh.) I don’t think I’ll repeat more violas, but I mainly got them to fill out and help keep the soil moisture in for some of my plants that hate drying out. Mission accomplished there, at least. And I love the goth black colouring on those ones.
I’ll make sure in future that any leggy-looking plants have other stuff packed around it, so the legginess doesn’t bother me. I have a better sense of how things age and mature over time now, so I know what might need concealment. Or banishment… cough cough, aubrietia.
Habit
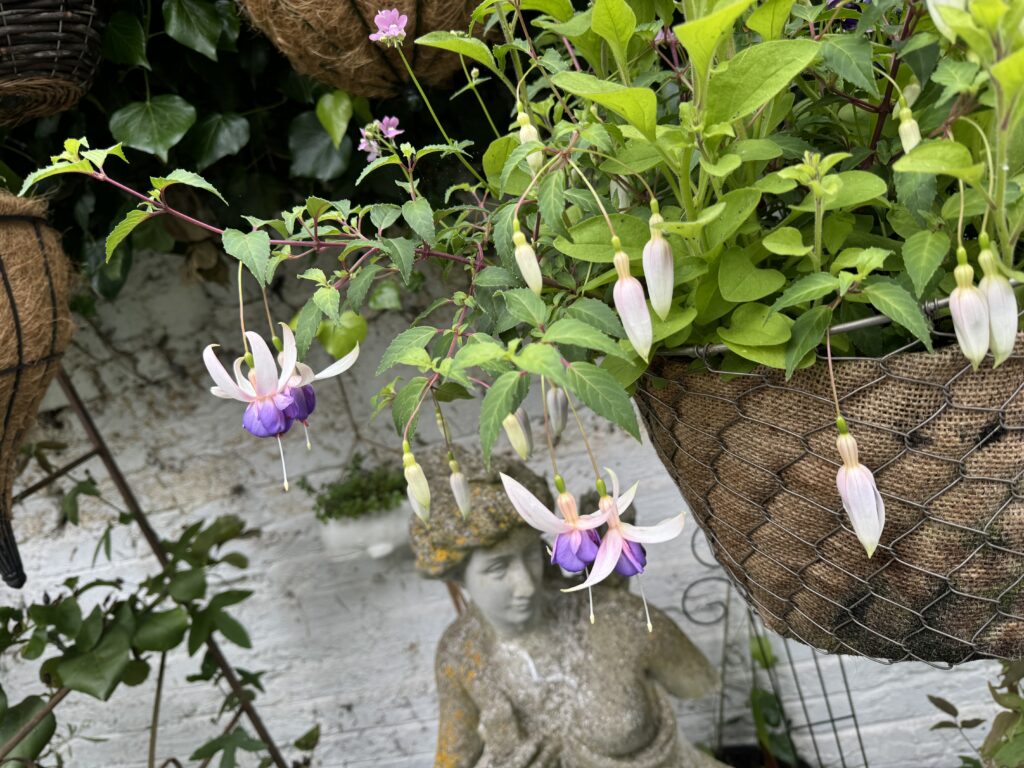
I made a couple wrong assumptions and plain mistakes about the growth habit of some of my plants. I foolishly thought pretty much all fuchsias were trailing. Nope! Turns out, one of the UK-hardy ones I got three of, Delta Sarah, is upright. It’s actually looking fine in my hanging baskets – the long branches that manage to reach out over the sides still have pendent blossoms hanging down, which looks cool IMO – but I wish I’d realised this before I made my purchases! (I’d probably still get it. Perfect colours and so many fuchsias aren’t UK winter hardy. But at least I’d have known!)
I also have a petunia blooming that I thought was trailing, but it came up so weirdly… I looked into it, and apparently it’s billed as having a “climbing” habit! I did NOT think petunias were meant to act like this, haha. It actually looks mostly OK here now that they’re flowering, and I’m glad they’re serving as something of an aphid/black fly trap to protect some of the other plants, but I’ll probably really read the fine print for “trailing” or “cascading” keywords in future when that’s the goal I have for a hanging basket plant. And they are definitely in a more awkward spot in some other containers, with nothing to climb. We’ll see how that goes over time.

I got another petunia Tidal Wave Silver where the copy described it as looking nice “tumbling” out of a container, but upon second reading, it also says it produces ever-longer stems so… I may have another leggy mofo on my hands soon, haha. (They had deep discounts on trays of FORTY seedings, so I have a lot of these coming up soon!) tbd
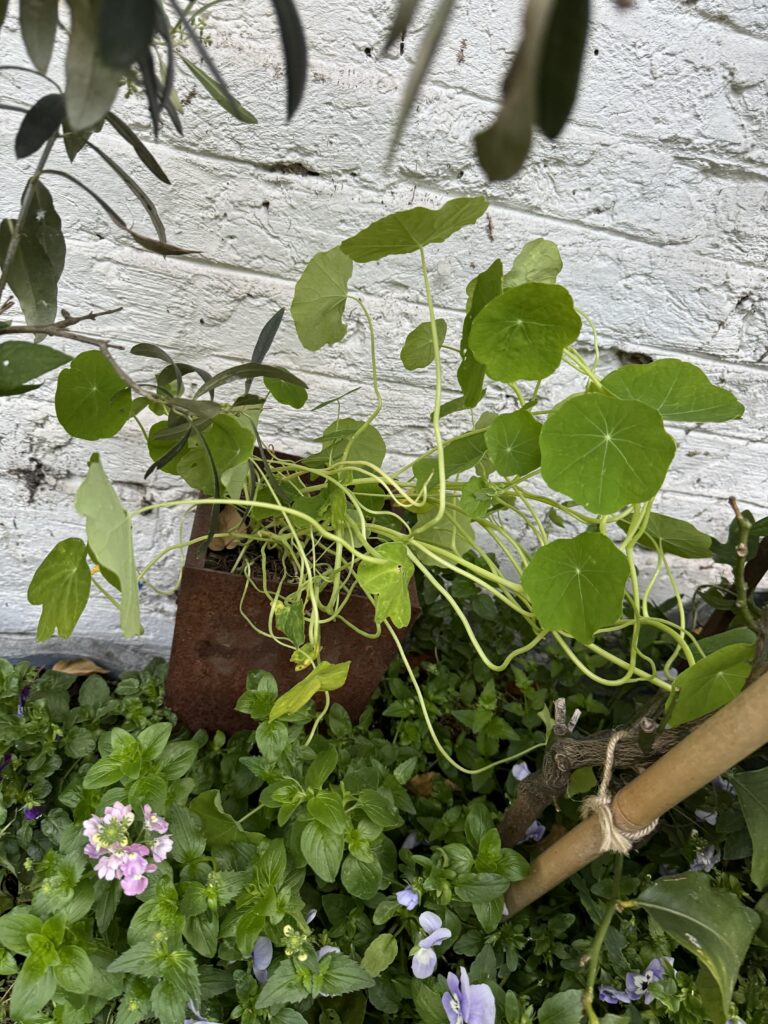
Also? Some plants that claim to be “trailing” are just lying! (Check out my “trailing” Purple Emperor nasturtiums for example, haha.) They were encouraged forward by me but this habit description just feels like a lie. Just call them “scraggly and awkward” on the packaging! OK, OK, I suppose we can’t do that. But: banished.
Shade/competition for food plantings
Because I was trying to make things look more quickly filled-in, I wasn’t very wise about how I co-planted things. I love planting food crops like strawberry and tomato and pea and bean plants in with pretty flowering things, for aesthetics and general happiness (I don’t have a big space for a dedicated veggie garden, and I want all my full-sun spots full of pretty blooms!) But… this backfired, haha.
I put a bare-root strawberry plant into each hanging basket across my garden, and something similar with my seedling-grown Tumbling Tom tomatoes. I thought they would keep pace in their growth with all their neighbours. But the quicker growth of the surrounding pretty plants like petunias, fuchsias, violas, and campanulas ended up shading and crowding out the food plants in almost all cases.
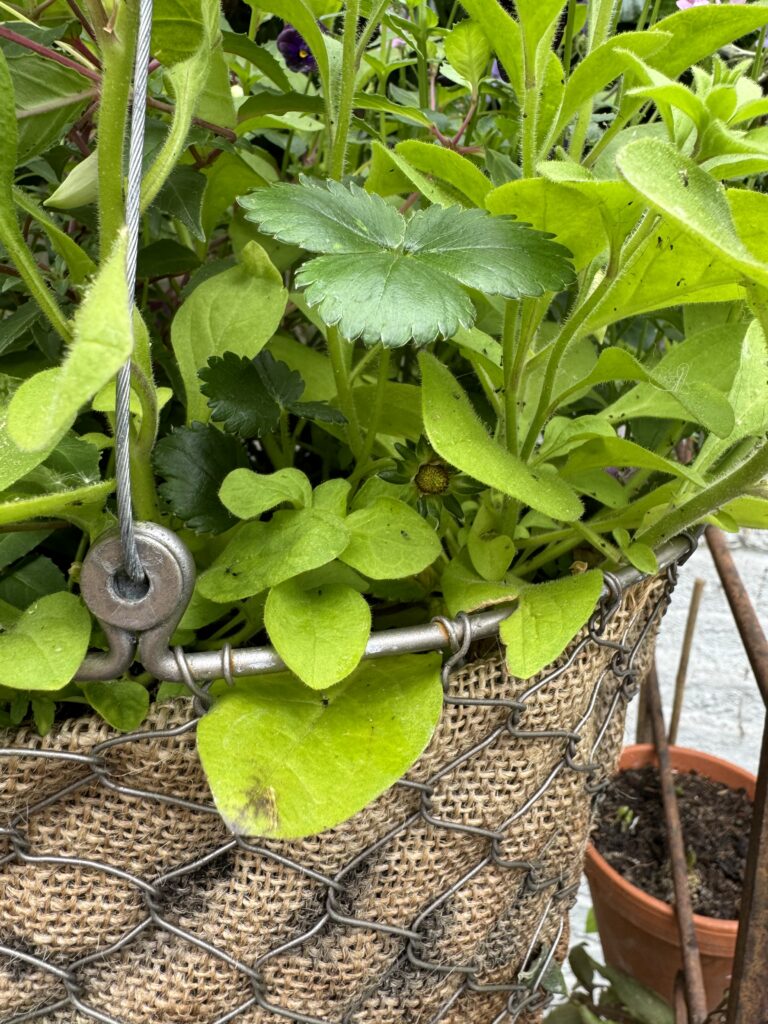
I wish I’d just waited to buy more mature food crop plants that could hold their own against their neighbours, but I’ll also deliberately give the food plants more space next time around.
I think we’ll still end up with some tomatoes (red, yellow, and orange, Tumbling Tom and Rainbow Drops), French beans (purple!), sugar snap peas (pink and purple!), and blueberries this year, and in future years we might get blackberries, cherries, and someday kiwis. We also already got lemons and figs, but we mostly just admire them as they don’t ripen amazingly well here. It’s not like our souls or stomachs will starve – but I’ll plan better next time.
Online plant health
I’m way more prone to random impulse buys at garden stores than I am with more strategic online shopping, plus I like “weird” plants rather than standard ones. As such, I get things online and often try to stay away from the in-person garden centres. (They’re also almost always full of other housey impulse buys here.) BUT, when I’ve bought things online, obviously I haven’t been able to inspect them. I’ve had poorly performing plants a few times! Here are my basic learnings:
- Wait! Just wait. Wait until later in the season! It’s so tempting to get set up with your intended late spring and summer plants really early, so they get time to fill out in situ. But the plants just aren’t as healthy fresh out of winter, and are more prone to whatever meagre tender new growth getting immediately munched up by snails and slugs. Plus I have a few that simply never grew (mostly I got my money back, but not always). I wish I’d waited for all the things I got as 9cm potted plants too early. BUT also, wait until:
- Seedlings! Seedlings, rooted cuttings, “plug plants,” and young plants were better value for money than bigger potted plants that I bought earlier on; they just meant waiting until later in the season. I was impatient! (I had a party-hosting deadline.) I will wait next time.
When I started prepping garden stuff it was still Feb-March, so seedlings simply weren’t “out” yet, and I wanted some filler ASAP (before a late March party, if I’m honest). I got more mature bigger plantings… but I did it back in February-March, and I don’t think I’d do that again. The plants just weren’t that robust so early in the year.
To be specific, aside from the many failed iris rhizomes, I had a lot of failed 9cm potted plants from early in the season. All NINE echinaceas died, my heucheras utterly failed to thrive… just not always worth it! The 9cm stuff I bought in person was fine because it was already doing well when I got it, as I could confirm visually. The 9cm stuff I’ve gotten online later (like in late April/May) has been mostly fine. It’s the early stuff that was a waste.
Furthermore, the mature plants I see at nurseries in person now are in much better shape than the ones I bought and let fill out – sometimes the exact same species! Obviously, nurseries get the plants from growers that have greenhouses etc. for professional setups with optimal conditions to get them along better. In future I solemnly swear to wait. (Ha. I’ve made two different online plant orders since drafting this post.)
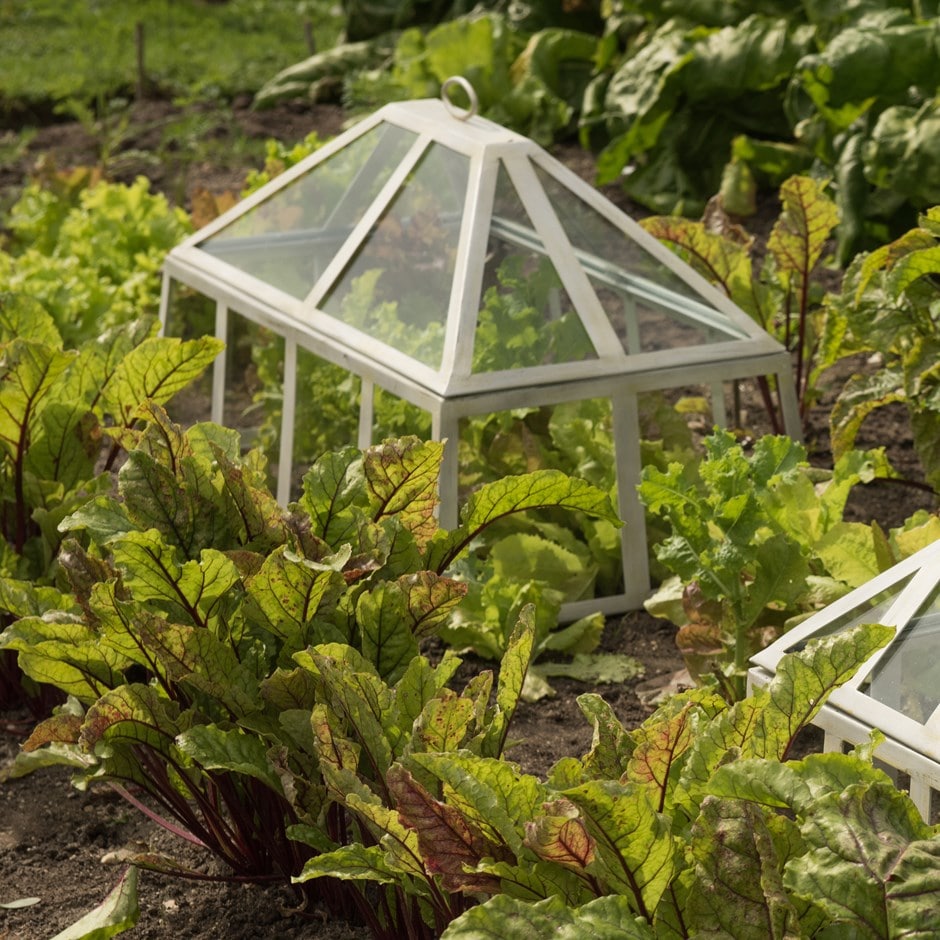
The things that *did* fill out nicely from 9cm early purchases (in person) include foxgloves and campanulas. And the 9cm online penstemon and coreopsis that seemed meh upon arrival have been filling out nicely, though they haven’t bloomed yet (as expected). I’d still rather have waited, but they weren’t mistakes, just exercises in patience. :) - Cold frame: A few things needed “hardening off” before they could be planted outside, both in my online purchases and stuff I grew via seed. This was a new term and concept for me. That would’ve been inconvenient to impossible without the cheap cold frame I bought on Amazon. I’m glad I got it, but if we remodel our kitchen and add in a side infill, I’ll lose the space where I have it. Not sure it’s a priority to keep. I’ll have to ponder this one.
Seems important for being able to work with seedlings or rooted cuttings, especially if we ever have a late frost even as far south as London. I do love the financial value of paying someone else to nurture and sell me a lot of young plants on the cheap which are a pain to grow myself, even with a cold frame! (I’m looking at you, heliotrope and brachyscome.) And hopefully it’ll be good for over-wintering things that hate frost, too, since it’s not like we have a big empty garage like we did in the USA.
There are some adorable Victorian-style solutions like this cloche that makes me go SQUEEEEEE…. so maybe with all the money we’ll already be spending if we do a side infill, we could shell out a little more somehow on a ridiculous glass and iron contraption that wouldn’t be an eyesore if we had it in our main garden space. Time will tell.
Growing from seed
I bought quite a few packets of seeds this time around, and had a bit of fun – but it was also a lot of work, many things didn’t work out at all, and most of my seedlings are disappointing at best. I’ve been more satisfied buying the same things I tried to grow in nurseries later in the season. I’ll probably keep growing out the seeds in packets I’ve already got, but not invest in loads more.
Here are my main learnings about seeds:
- “Direct sow” is more fun. Even though I bought some things that needed to be sown indoors and some others which could be sown directly outdoors, I don’t really love the indoor sow ones. While it’s fun to show my kids little sprouts poking up, it was a lot of work and takes up a lot of valuable kitchen space (a big consideration in London).
- Environment. For things that do need sowing indoors, it can be hard to control the temperature with our current crappy/thin windows. I stole a heat mat from underneath a nearly dead orchid houseplant and repurposed it into keeping my seedlings warm enough, but even on the warmest setting it was sometimes TOO warm, so I’d have to use a thicker ceramic/terra cotta saucer to insulate them. If I got it wrong, I’d have mould sprouting from them. It was all too fiddly for me and it turns out I’d rather buy seedlings that someone else has sprouted in a commercial greenhouse, haha.
- Strategic placement. To be fair, it doesn’t necessarily help when your four-year-old demands to sow an entire packet and you give in bc you’re exhausted but then you have no idea where she put them, or which ones are flowers and which are radishes, haha. But even of the ones where I bear full responsibility, some of my seeds that are reputedly really easy to sow didn’t thrive because I’d planted them in amongst other more mature or fast-growing plants or tubers/bulbs that then shaded the seedlings from getting any decent light. Oops.
- Track your sowing! It’s very easy to forget where you’ve planted seeds, as opposed to more mature plants where you can see some identifying foliage poking out! Seedlings all look too similar in the beginning, and some (like all four varieties of poppies, heh) I’ll just have to wait until/if they bloom to tell which colour went where in the end. (By the way, since I drafted this, only one of the four poppy types have reliably come up… all awkward and leggy. Hungarian Blue I believe.)
- Duds. Some seeds that never seemed to germinate apparently required cold prior to sowing to simulate winter dormancy. I could’ve refrigerated or even frozen some of those but I didn’t bother, and guess what, those didn’t flourish, particularly the violets. My hope is that they’ll surprise me next year, but it’s annoying when this happens if you expected an easy crop.
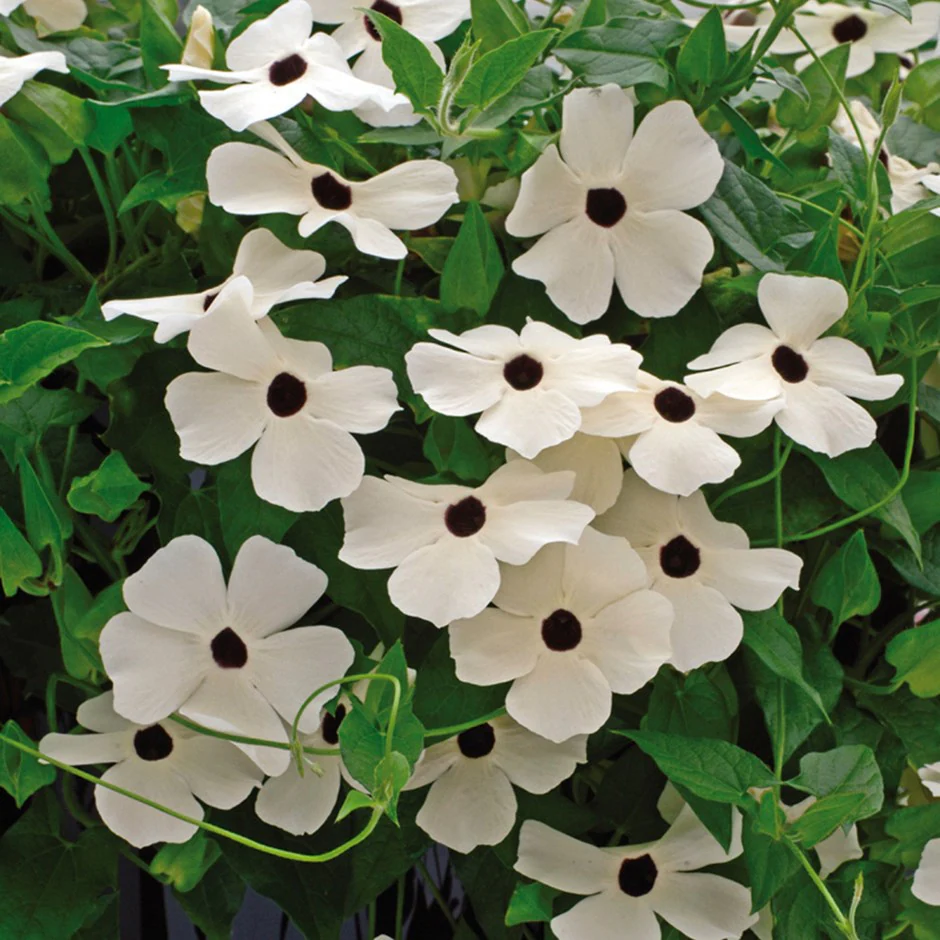
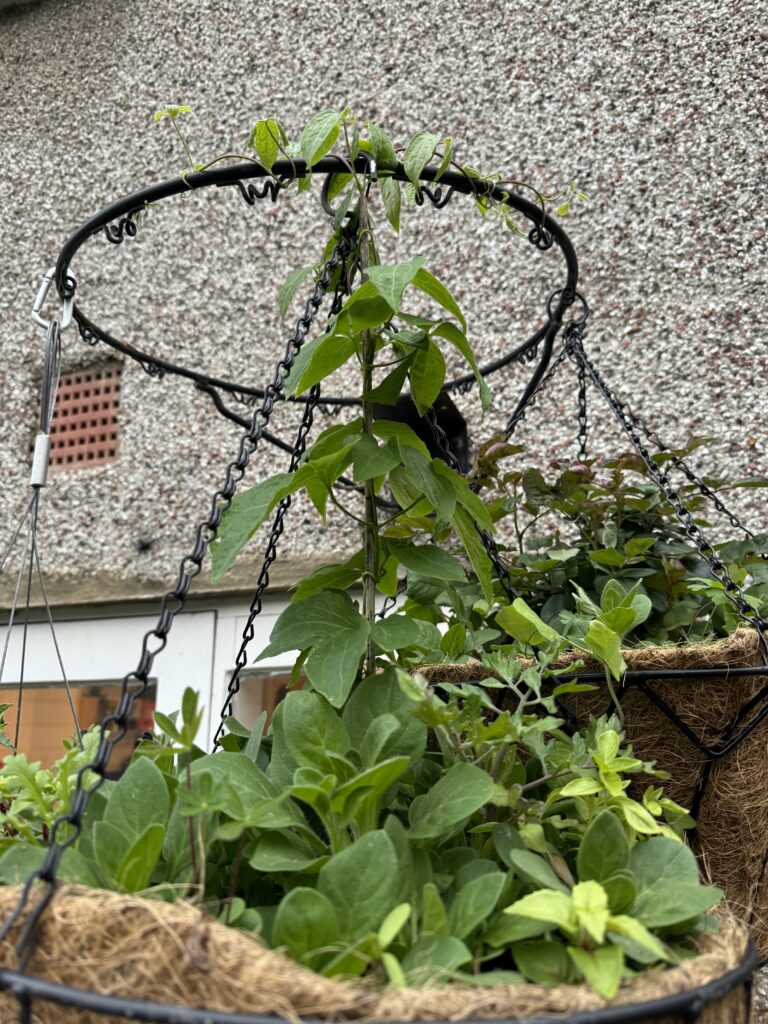
- Late surprises! Hilariously, I gave up on a few seeds when I thought they hadn’t germinated, but now they’re starting to turn up in some of my hanging baskets! Clearly I must’ve reused that soil from my little peat-free seedling pots when I was running low and needed to fill out a basket, haha. I’ve got at least two spry little white Thunbergia Alata vines coiling up the chains of one hanging basket. (The perfect placement next to that chain for climbing support makes me think maybe I did this on purpose and forgot? See above re: needing to track where I sow better!)
- In terms of successful seeds, I had medium success with some poppies (all somniferum/opium varieties), although they’re floppy and awkward and I likely won’t repeat them after I use up these seed packets. I’m doing OK with nasturtium, peas, stocks, nemophila, one lupin, and even a couple little tomatoes, even though they’re not all that far along now. (They’re not dead so I’ll call it a success.) I think my globe thistle and cornflower and scabiosa would’ve thrived without being over-shaded by dahlias.
The seedling that’s doing surprisingly well is my cobaea scandens vine. It’s not blooming yet, but it’s been clinging and twining its adorable way right along my metal arch support next to a sympathetically coloured passionflower, and I can’t wait to see it shine. I also haven’t yet received any of my sweet pea seedlings yet, but I have the feeling those will go similarly wild once I get them. (Part of my big rearrangement project was to get the sweet pea pot into a sunnier spot.)
I can foresee affixing a trellis the full length of my most sunny fence and just letting it get covered with climbing annuals from seed every year, blending in with more reliably perennial clematis/passionflower so I won’t be disappointed if my seedlings don’t flourish. That seems like the right approach to growing from seed – high impact but with good mature backups in the mix. Admittedly, this year when I had to start from nothing wasn’t a great test for how it’ll be down the road. I also hear cobaea scandens may in fact manage the London winter OK – we’ll see!
OK, on to the next climbers we have to discuss…
Clematis are harder than I thought!
I got a good number of clematis plants, thinking that since my garden lacks space and has high walls, I could really take advantage of vertical interest, as well as driving cohesion by repeating a few of the same clematis (clematices? ha) across different locations. Seems smart, right? (And what declension noun is it anyway‽)
I had the idea that clematis…es were pretty chill to raise as long as you knew when to prune them, didn’t let the roots get hot, and didn’t get the wrong size for the planting spot – so I shopped exclusively for more compact varieties that could handle being grown in a pot. And yet! The drama! To wit:
- Delicate stems! I have accidentally stressed or snapped multiple delicate little woody stems, which seems to have resulted in major damage elsewhere in the plant. I guess I need to be even more careful than I already was (I swear I was!) when doing things like initially planting/repotting them, gently weaving them into a bigger and prettier plant support than the nursery one they came with, planting a slightly nearby neighbour, slowly walking by a planter containing a clematis, and/or accidentally making eye contact with said clematis, etc. Yikes, y’all! So fragile. Some of them seem to have spontaneously stress-snapped themselves (‽) and I just can’t even.
On the positive side, after some or all the vines apparently got damaged enough at the base for all the leaves and flowers on that stem to die (on multiple different plants, and different varieties and placements!) I’ve had a couple come back from the roots. One that did this is now utterly thriving! So, I would hang on to the roots and keep the faith if you have this happen to you. And I plan to over-prune some of mine, at the risk of missing out on blooms for a year, so that these pathetic stems can get replaced with sturdier stuff that I’ll be obsessively careful with.
This is also a plant I recommend buying later in the season, not in like Feb as I did – the clems in the garden centres are much more robust than mine that I’ve had planted for months, even the ones that didn’t get snapped. Later is better. W-A-I-T. - THE SNAILS! Several of my clems have been absolutely obliterated by mollusc mayhem. Not even just the littler/less established ones, either! It seems to be slightly random which ones become dinner and which grow into lovely blossoms. Which the snails then eat the petals of. Argh! I bought some copper rings that are supposed to help and it does seem to be working where I can totally control the placement so there are no other paths in. That won’t last forever but maybe it’ll at least let it get established.
- Heavy blossoms! Some varieties I picked apparently aren’t so prudent, as they need so much sturdy support for their own super-heavy blossoms that they start to snap. (I’d blame evolution, but we hybridised this thing ourselves – looking at you, Diamantina!)
If I fall in love with any other big fluffy blossomed ones, I’ll grown them with a super sturdy support and not just the cheap little trellis I thought was such a great deal, or the lazy bamboo supports I’ve hacked together. I solemnly swear to spring for decent elegant rusted steel obelisks, or a big sturdily wall-mounted trellis when I have a more permanent landscaping design. But I have to factor the cost of supports and any installation from a pro into the cost of these things. I also might have to factor the labour of tying up heavy blossoms. My goodness, get it together, Diamantina! And Josephine, and Multi-Blue, and Kokonoe, and Mango… how did we let this happen‽
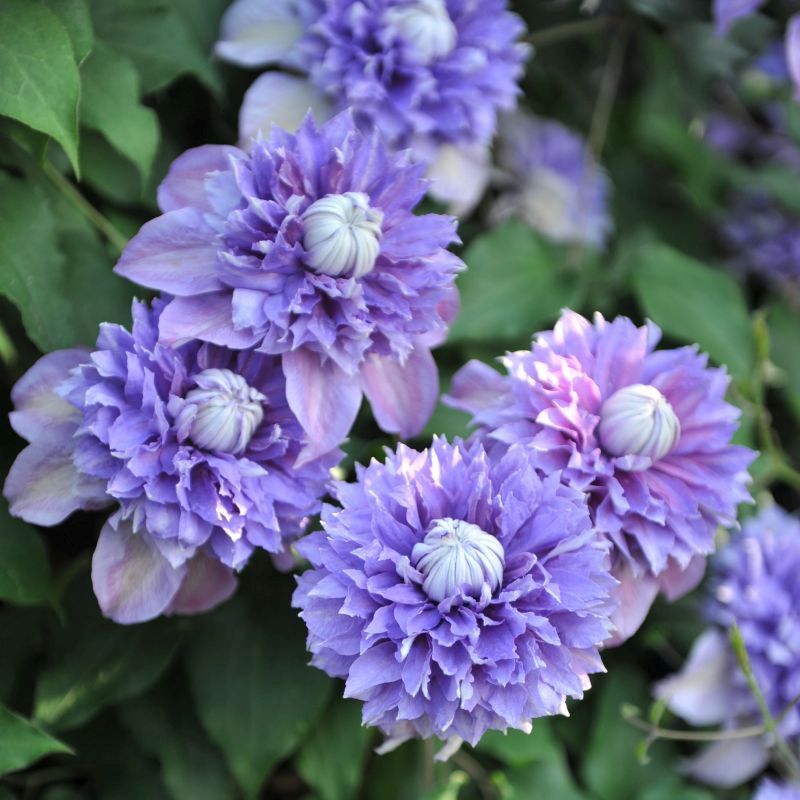
Speaking of clem blossom forms, I’m seeing advantages and disadvantages to both. The heavy fluffy-style blossoms can snap their own stems from the sheer weight, and they take ages to open, but then the blossoms last much longer and seem more slug resistant. The more delicate, single-blossom style (I have so many haha – I have Alaina, Daniel Deronda, and Star of India, and let’s be real I’ll probably acquire more) seem more slug-feast-prone on the actual blossoms, but are lighter flowers and thus easier to support, even the huge ones. Both are lovely, and let’s be real, I’ll probably keep buying all sorts despite my initial troubles because they’re just stunners when they do work.
I got a few winter-flowering varieties, too – Avalanche to try and cover an unsightly fence (poor coverage job but it looked OK), Apple Blossom to cover an unsightly bush we had to over-prune (not as aggressive as I had hoped but then it needs more time to establish), Freckles (weird habit right now but I haven’t seen it in bloom yet), and some Napaulensis which I had to cancel since they go summer dormant and my order kept getting delayed into July.
One tip I read here is to not just sink the roots a bit, but also to angle them 45 degrees towards whatever support they’re meant to climb through (regardless of whether that’s a plant, trellis, etc). Another site said to plant them behind the bush/tree they’re meant to go through since they’ll seek the light at the front naturally. Seems wise and I’ll definitely try it – I actually am already testing the angle and sink parts with a Star of India I relocated to attempt to mitigate slug damage and pair it up with a sympathetic climbing rose. Time will tell!
Finally, they pronounce it CLEMatis here in the UK, but it’s definitely cleMAtis in Seattle where I’m from. Trips me up here.
Stile styling
This is a pretty niche problem, but – my neighbours and I get along so damn well that we built a gate with country-esque stiles to climb over it into each other’s back gardens. (Was a new word to me before this idea.) Cool, right?
Yes, but…. they already had a hydrangea in place there, and I had a trough-style concrete planter there with a wide flat rim. I think their plants got trod on a bit when we held an admittedly MASSIVE joint party with people climbing back and forth a bunch, and I have it on good authority from another partygoer that an unnamed grownup stepped on the edge of my concrete planter on their way down from the stile, causing it to tip forward and alllll of the contents to spill out, haha. (One coreopsis casualty later, things have mostly recovered, but argh.)
So I guess I need to consider placement of what I plant around that part of the garden? It’s unlikely the location of the gate + stile will ever change, so that back corner will always be the thoroughfare. I might actually look into getting a small “don’t tread on me” plaque for the planter, a bit tongue in cheek of course, but we’ll see. That party may have been the exception to the rule of “don’t step on planters, full-grown adults!”
I’ll write up a whole post about stiles and neighbours at some point, don’t worry. :)
Pinterest is not enough
I had made this Pinterest board to track all my plantings, which was helpful for a big pulled-out visual scan of, like, what colour do I have too much of, which pink might trend too coral for my liking compared to the other pinks, etc… but with all the containers I have, I ended up needing a full spreadsheet to keep track of everything.
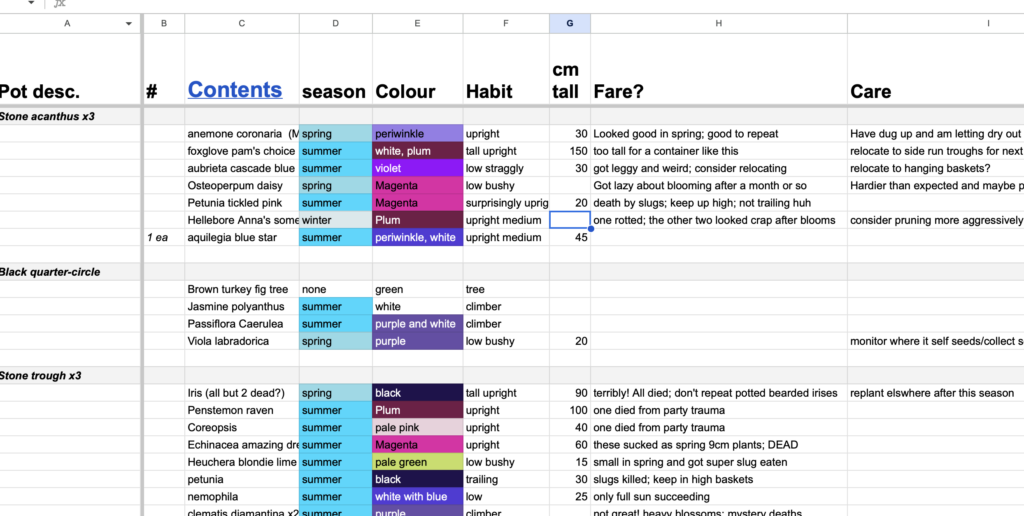
I now have columns to help me track things like habit, height, colour, care notes, bloom season, and how each plant fared so I can avoid repeating mistakes. It’s not perfect, and admittedly a bit fiddly, but I hope it’ll help me make more beautiful aesthetic decisions as well as track the items that merit a bit of work for any over-wintering attempts. It brings me joy to look at the colour values for each future blossom in delighted anticipation, haha.
Ooh, I just realised I should go add in percentage calculations for which things bloom during which season, so I can more easily tell what to get more of… bye for now!!